

MOUNTING GUARD RAILS WITHOUT TRACK CLIPS
- Scott Vargo
- Apr 9, 2024
- 3 min read
EASY TO INSTALL - STURDY - EASY MAINTENANCE
If you're looking for an easy solution for realistic guard rails that don't mount to the track edge, here is a neat trick. This method will work for plastic sectional track and routed wood tracks. I'll show you how to add #6 finish nails hidden inside the guard rail posts to mount directly to the layout surface that makes for a durable mount that is easy to remove.

This method works with Scalextric double wall polyethene silver guard rails. I have found these are the most realistic looking for my layout. SCX also sells the exact same guard rails but they are a little harder to find. The Scalextric part number is C8212 for a set of 5. SCX guard rails are listed as "TJR Guard Rail".


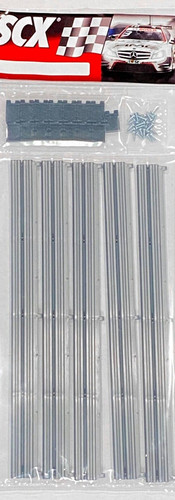
You'll need a power drill and a 5/64 drill bit (or #47 bit, which is close). You can also use a pin vise to drill these by hand as the plastic is pretty soft. You'll also need some #6 finish nails. Look for #6 finish nails that are a standard 1.5" long as these the perfect length for mounting the guard rails into the layout surface or routed wood deck.

From the bottom, drill a hole through the 2 horizontal supports inside the guard rail post. Use caution not to drill through the top support. Make sure you drill straight and stay centered! Go easy with slow speed as the plastic is fairly soft.

Next, bend the top portion of the rail post back enough to slip the nail into the first hole, past the top support:

Push the nail through the bottom hole and adjust the head of the nail to seat inside the top horizontal support. Now your mounting nail is hidden inside the post! Repeat these steps for the remaining guard rail posts.

Next will be drilling the holes for the guard rail mounts into layout surface. This step will require some precision. Practicing on a test surface is recommended. The key to getting straight guard rails is to make sure you drill perpendicular to the top surface, meaning exactly at 90 degrees to the top flat surface, or else your guard rails will lean or buckle.
Once you've located the area where you want to place your guard rail, lay the guard rail flat with the nail tips lying on the surface where you want them. Using a fine point Sharpie, mark dots exactly where the nail tips are located. You can use a ruler and pencil line as a straight guide if you're running a long line of guard rail. Make sure your drill points are EXACT.

Drill the first hole carefully into the top surface (Remember- nice and straight!). Insert the nail in the first mounting point and then check your dots to make sure everything lines up. Adjust your marks if necessary. (Make sure the guard rail isn't leaning when you check your marks or it may throw off the spacing).

Now drill the rest of the holes and finish mounting the guard rail. When adding your next guard rail, make sure you account for some end spacing and leave a small gap for some wiggle room if you need to remove the guard rail. * Curved areas work the same: Just start with your first mounting point and work your way around the curve as you place you drill marks, bending the guard rail to conform to the curve as you mark the drill points.

The examples shown here were done on a routed wood track. This method will also work with plastic sectional track mounted on top of the surface with guard rails mounted next to the track. You will just need to space the rail mounts away from the track edge slightly to account for the thickness of the posts.
Good luck and please feel free to comment here with any questions.


